If you are a newcomer to horses, ponies and riding then one
of the first things you will use is a bridle!
Bridles are used to control the horse's pace, speed and direction. There are different types of bridles to be
used with different types of bits. In
this blog I wanted to concentrate on the basic snaffle bridle which is used
most widely in English riding.
The snaffle bridle consists of (top to bottom) a Headpiece, a Browband, a Throatlash,
Cheekpieces, a Noseband and Reins plus the bit.
Headpiece
This fits over the head at the Poll and behind the horse's ears. The Throatlash is part of the Headpiece and
so are the straps that attach to the Cheekpieces on either side of the horse's
face. When the Headpiece is attached to the Cheekpieces the small buckles
should lie slightly above the horses eye level.
The Cheekpieces should be of equal length on each side of the face and
the same, or closest hole should be used to buckle up to ensure the headpiece
sits centrally.
Browband
This sits around the front of the head, just below the ears and connects to the
Headpiece to prevent the bridle slipping back down the horses neck. It is important that the Browband is the
correct size as a small one may pinch the horse's ears or cause rubs, too large
and it will allow the bridle to slip backwards.
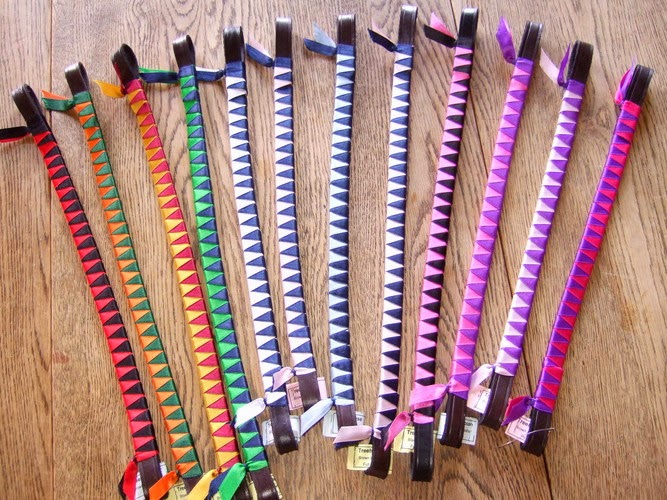
If you don't fancy the plain Browbands then there are some amazing ones
available!
Throatlash
This strap sits under the cheek and around the horse's throat (as you would
expect) and is sometimes called the Throatlatch. This is to prevent the bridle coming off over
the horses head if it is pulled forward for any reason! It usually buckles on the near side of the
horse.
To fit this correctly you should be able to put the width of a hand (ie: from
thumb to little finger) between the cheek and Throatlash. This is to ensure that the horse has no
restrictions to his breathing.
Reins
It is important that the Reins are the correct length for the rider, horse or
pony and activity. Often show
jumpers and eventers have longer reins
which will allow them to let them slip through their hands to the buckle when
landing over a difficult fence if necessary.
It is important that Reins are the correct length as if they are too
short the rider will be encouraged to lean forward into an incorrect riding
position. Long Reins can be dangerous as
they may get caught around the riders foot or stirrup.
Reins also come in different widths and this is equally important as too wide
reins will prevent a child from holding them correctly. However, reins must be wide enough to be
strong for larger horses!
Reins can be covered in rubber to aid grip but are also available plain,
plaited or laced. It is largely a matter
of personal preference but plain leather reins can become slippery when wet
which will cause the reins to be more likely to slip through the riders
fingers.
Nosebands
There are a huge variety of Nosebands available, all for different functions!
- Cavesson - is the most common type used. It can be plain as in the first picture,
raised or piped as in this picture.
These nosebands do not have much function but aesthetic as most horses
or ponies look better with a noseband than without. The noseband should be buckled below the
cheek bones but at a height that ensures it does not rub on the
cheekbones. When buckled (under the
nose) there should be space for 2 fingers between the horses nasal bone (on
top) and the nose band.

- Flash - made up of a cavesson noseband with a
loop and a strap which passes through this loop. The strap passes below the bit round the chin
groove and the buckle fastened just under or just over the horses lips (DO NOT fasten in the chin groove as this
will cause injury). The cavesson strap
is usually buckled so that the noseband is slightly higher than for a cavesson
on its own and is done up more firmly.
The flash strap is done up 4 fingers above the nostrils to ensure that
breathing is not affected and tighted so that 1 finger can fit between the
strap and the chin. The aim is to stop
the horse opening his mouth or crossing his jaw.

- Drop - this noseband has 2 sections, the top
part goes over the horses nose as a cavesson would, the lower part is secured
below the bit under the chin groove. It
is important that the front strap is not fastened too low and as with the flash
strap it should be 4 fingers above the nostrils. The drop part should be fastened tightly
enough to prevent the horse crossing his jaw or opening his mouth too wide (1
finger width). Again, the buckle should be below the lip and not in the chin
groove.

- Grackle - this again is used to prevent the
horse opening his mouth or crossing the jaw.
It consists of 2 straps which cross over at a pad which should be lined
with sheepskin. The design of this means
that a larger area of the head is acted on with the pressure point on the nose
and therefore it has a stronger effect than the Drop or Flash nosebands. Fitted in a similar way to the Flash with the
top straps fastened just below the cheekbones.
The lower straps are fitted below the bit again in the chin groove and
buckle just below the lips.
Putting on a bridle.
Assuming that it is the horse's own bridle!
- Tie the horse up with a headcollar and leadrope.
- Place the reins over the head.
- Undo the headcollar and fasten around the horses
neck.
- While holding the bridle in your left hand, put
right arm under neck/head and pass bridle to right hand.
- Holding the bridle by the cheekpieces (in right
hand) cradle the bit in the left hand and place it on the horses lips. He should open his mouth, if not, place your
left thumb in the corner of his mouth and wiggle - this should encourage him to
open his mouth!
- Gently slide the bit in, being careful not to
bang the teeth, at the same time raising the bridle in your right hand. Fold each ear under the headpiece gently with
your left hand and tease the forelock foreward.
- Fasten the throatlash and the noseband (ensuring
it passes under the cheekpieces).
- If you are not riding immediately the reins
should be twisted and then one rein passed through the throatlash before it is
fastened. This will prevent the horse
from getting a leg caught in the reins.

I will be uploading a 'How to ....' video to my vlog channel in the next couple of weeks about tacking up.
Removing a bridle
- Place the headcollar around the horses neck and
fasten.
- Unbuckle the noseband and throatlash.
- Take the reins in your right hand and bring them
up to meet the headpiece, using your left hand too take hold of the bridle
either side of the headpiece (by the browband) and gently ease the bridle over
the horses ears.
- Slowly lower the bridle, taking care not to
lower too quickly that the bit bangs on the horse's teeth.
- Most horses will open their mouths and allow the
bit to drop out.
- Put the bridle over your shoulder and replace
the headcollar.
Look out for my blog about Bits and Martingales next week.
Have you seen my latest vlog on my You Tube channel. Horse Life and Love
Please check it out and SUBSCRIBE.
You can also follow me on Facebook for
updates on Chesney, Basil, Fidget and Daisy.
Until next time!
Jo